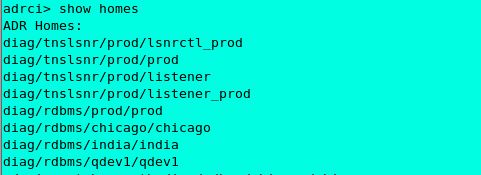
View Other Users concurrent Request Output
R11
System Administrator à Profile à System
Search for profile à 'Concurrent: Report Access Level'
Level
|
Value
|
Result
|
Site
|
User
|
The user can only view the requests submitted by him
|
Responsibility
|
Responsibility
|
That user can also review the log and report output files from all requests submitted from the current responsibility
|
User
|
Responsibility
|
Any user of that responsibility can also view the log and report output files from all requests submitted by any other user of that responsibility
|
R12
Unfortunately in R12 profile 'Concurrent: Report Access Level' does not work, it is a bit more complex process to achieve this
In R12 this was replaced by Role Based Access Control. The UMX Role Based Access Control (RBAC) is to control who can view request output files.
Note :- You should have SYSADMIN user access.
Functional Developer -> Core Services
>> Search for 'Concurrent Requests'

Click on 'Concurrent Requests' and then on tab 'Object Instance Set'

Ø Click Create Instance Set

Ø Give Name/Code/Description
Ø For Predicate
è Enter below code if you want to see request output for all concurrent programs .
&TABLE_ALIAS.request_id in(
select cr.request_id
from apps.fnd_concurrent_requests cr, apps.fnd_concurrent_programs cp
where cr.concurrent_program_id = cp.concurrent_program_id
and cr.program_application_id = cp.application_id)
è Modify the above query based on your requirement.
n Add and cp.concurrent_program_name if you want to give access only for particular program name, etc.
Ø 'Apply' it and it will give the Confirmation with Code you have entered.
Ø Goto User Management > Role & Role Inheritance
è Click on 'Create Role'

Ø Category – Miscellaneous / Application – Application Object Library
Ø Role Code (Prefix UMX| will be added whatever you provide example : UMX|AKTEST)
Ø Display Name/ Description
Ø 'Apply'

Ø Click on 'Create Grant'

Ø Provide Name / Description
Ø Data Security -> Object -> 'Concurrent Requests'
Ø Click on 'Next'
Ø Data Context Type -> 'Instance Set'
Ø Instance Set -> Instance you Created above, AKTEST

Ø Click 'Next'
Ø Set -> Set -> 'Request Operations'

Ø Click on 'Next' -> Preview and then 'Finish'

Ø It should give you the message for successful creation of Grant.
Known Issue
Sometimes it will give below Error. Just try 3-4 times, it should be fine.
Sorry didn't dig much into it to find the exact reason behind it.
Error Page
|
You have encountered an unexpected error. Please contact the System Administrator for assistance.
|
Goto 'User tab
Ø Search for the user you want to assign the grant.

Ø Click 'Update'

Ø Click 'Assign Role'
Ø Search for Role you have created above 'View All Concurrent Requests outputs' (Code - UMX|AKTEST)
Ø Give Justification
Ø You can put active date from past to view previous requests outputs.

* Now assigned user can see the output of other user's request from the responsibility from which that request had been launched.
>> You can also use the below script to assign the grant to a user.
begin
wf_local_synch.PropagateUserRole(p_user_name => 'USERNAME'
,p_role_name => 'UMX|AKTEST ');
commit;
End;