Monday, March 18, 2019

ADRCI how to purge oracle trace files

ADRCI – Auto Purge Old Trace and Incident files
How to purge Oracle trace files through adrci
What is ADRCI?
ADRCI is a new feature introduced from 11G onwards. It is used to deal with diagnostic information.
It has multiple features such as:
  1. Analyze diagnostic data within the Automatic Diagnostic Repository (ADR).
  2. Create a package with incident/problem information for Oracle Support.
  3. Auto purge of old diagnostic files.
Auto purge of old Diagnostic files:
One of the feature of ADRCI is to purge the old diagnostic information/files. This is controlled by two parameters in ADRCI utility.
  1. SHORTP_POLICY:  Which is used for automatically purging short-lived files, i.e. core dump files and traces, expressed in hours and defaults to 30 days.
  1. LONGP_POLICY: Which is used for automatically purging long-lived files, i.e. incidents and health monitor warnings, expressed in hours and defaults to 1 year.
How the purge cycle is defined:
The auto-purge will ONLY purge every 7 days and this has always been the way it was designed. It then uses the SHORTP_POLICY and LONGP_POLICY values to determine how much information to purge. The ADR purge is run towards the end of the regular AWR purge.
There is no control on the purge frequency, it is fixed to be 48 hours after startup and then every 7 days. Manual purge is the only way to control purge actions in between.
Some commands for ADRCI:
Set environment variable
. oraenv
SID
After set environment Enter adrci command to connect adrci prompt


[oracle@prod ~]$ adrci
ADRCI: Release 11.2.0.1.0 – Production on Mon Feb 6 00:42:15 2017
Copyright (c) 1982, 2009, Oracle and/or its affiliates. All rights reserved.
ADR base = “/u01/app/oracle”

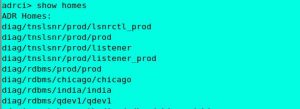
Adrci> show homes (This command will list all the available database trace directories.)
adrci> show homes
ADR Homes:
diag/tnslsnr/prod/lsnrctl_prod
diag/tnslsnr/prod/prod
diag/tnslsnr/prod/listener
diag/tnslsnr/prod/listener_prod
diag/rdbms/prod/prod
diag/rdbms/chicago/chicago
diag/rdbms/india/india
diag/rdbms/qdev1/qdev1
adrcihome
Adrci> set homepath <home path to set>(This command will use to set a specific home value (trace directory)
adrci> set homepath diag/rdbms/chicago/Chicago
sethome
Adrci> show control
This command will list the settings of “shortp_policy”, “longp_policy” and when was the last auto purge happened.
show control1
adrci > set control (SHORTP_POLICY = 168)
adrci> set control (LONGP_POLICY = 168)
This command is use to reset the short policy and long policy and this is set in hours.
After set control now sort policy and long policy is 168hr /7 days.
Adrci>Show control
showcontrol2
SHORTP POLICY (ADRCI SETTINGS) –
168 hours / 7 days (will keep last 7 days of files and delete all)
LONGP POLICY (ADRCI SETTINGS) –
168 hours / 7 days (will keep last 7 days of files and delete all)
ADRCI SETTINGS and PURGE:
Adrci> set homepath <home path to set>
adrci > set control (SHORTP_POLICY = 168)
adrci> set control (LONGP_POLICY = 168)
Purge – this will purge all the files by keeping last 7 days of files.
Adrci> purge
Manually purge the traces-
Adrci> help
Use to get help on commands.


====================================================
Automatically purging
Sometimes we are facing with space related issues due to the huge number of trace file generation. Automatic purging can help us in this situations if set short retention time for trace files.
  1. Type show homes to see current homes supported by ADRCI and set homepath.
    adrci> show homes
    ADR Homes: 
    diag/rdbms/db12c_stby/db12c_stby
    diag/rdbms/db12c_stby/db12c
    diag/rdbms/db12c_stby/DB12c
    diag/tnslsnr/Standby/listener
    diag/clients/user_oracle/host_2436394132_82
     
    adrci> set homepath diag/rdbms/db12c_stby/db12c_stby
    

  2. The automatic purging runs on schedule defined in retention policy .To check current policy for home, we can use two methods :
    adrci> show control
    
    ADR Home = /u01/app/oracle/diag/rdbms/db12c_stby/db12c_stby:
    *************************************************************************
    ADRID                SHORTP_POLICY        LONGP_POLICY         LAST_MOD_TIME                            LAST_AUTOPRG_TIME                        LAST_MANUPRG_TIME                        ADRDIR_VERSION       ADRSCHM_VERSION      ADRSCHMV_SUMMARY     ADRALERT_VERSION     CREATE_TIME                              
    -------------------- -------------------- -------------------- ---------------------------------------- ---------------------------------------- ---------------------------------------- -------------------- -------------------- -------------------- -------------------- ---------------------------------------- 
    3514698554           720                  8760                 2016-05-31 00:54:57.566484 +05:00        2016-07-07 23:27:37.789953 +05:00                                                 1                    2                    82                   1                    2016-05-31 00:54:57.566484 +05:00       
    1 rows fetched
    or
    adrci> select SHORTP_POLICY,LONGP_POLICY from ADR_CONTROL;
    
    ADR Home = /u01/app/oracle/diag/rdbms/db12c_stby/db12c_stby:
    *************************************************************************
    SHORTP_POLICY        LONGP_POLICY         
    -------------------- -------------------- 
    720                  8760                
    1 rows fetched
    By default retention is 720 hours for short policy and 8760 hours for long policy.
    Short policy include the following files :(Trace files, Core dump files, Packaging information)
    Long policy include the following files:(Incident information, Incident dumps, Alert logs)
  3. To change the retention policy :
    adrci> set control (SHORTP_POLICY=120); -- 5 days
    
    adrci> set control (LONGP_POLICY=720); -- 30 days
    
    
    --check changes
    
    adrci> select SHORTP_POLICY,LONGP_POLICY,LAST_AUTOPRG_TIME,LAST_MANUPRG_TIME from ADR_CONTROL; 
    
    ADR Home = /u01/app/oracle/diag/rdbms/db12c_stby/db12c_stby:
    *************************************************************************
    SHORTP_POLICY LONGP_POLICY LAST_AUTOPRG_TIME LAST_MANUPRG_TIME 
    -------------------- -------------------- ---------------------------------------- ---------------------------------------- 
    120 720 2016-07-07 23:27:37.789953 +05:00 2016-07-16 22:37:52.700123 +05:00 
    1 rows fetched
    
    adrci> 
    
    
    Initially automatic purging runs 2 days after instance startup, then by policy defined interval.


Manual purging
  1. Type show homes to see current homes supported by ADRCI and set homepath.
    [oracle@MAINDB ~]$ adrci
    
    ADRCI: Release 12.1.0.2.0 - Production on Tue Feb 23 19:18:42 2016
    
    Copyright (c) 1982, 2014, Oracle and/or its affiliates. All rights reserved.
    
    ADR base = "/u01/app/oracle"
    
    adrci> show homes
    ADR Homes: 
    diag/tnslsnr/MAINDB/listener
    diag/rdbms/cdb1/cdb1
    
    adrci> set homepath diag/rdbms/cdb1/cdb1


  2. To purge diagnostic data that is older than the amount of time (minutes) given in the purge command. For ex to purge diagnostic data that is over 1 day old (1440 minutes).
    adrci> PURGE -age 1440 -type ALERT
    
    --You can also pruge TRACE files with same method:
    adrci> PURGE -age 1440 -type TRACE
    
    
  3. To remove all data older than one minute use:
    adrci> PURGE -age 1 -type ALERT
    adrci> SHOW ALERT
    
    ADR Home = /u01/app/oracle/diag/rdbms/cdb1/cdb1:
    *************************************************************************
    
    No alert log in selected home
    adrci> exit
Database Hung! what to do?

Development team reported that your oracle database is hung. Users can't log in and exiting users can't complete their transaction. The DBA's with SYSDBA privileges may also be unable to log into the database. Your challenge is to troubleshoot the problem what is causing this database to hang and then fix the problem ASAP.


Step 1: Check the alert log to see if database has reported any errors, which may indicate why the database is hanging.

Step 2: See if you can get AWR or ASH report or query some of the ASH views. You may notice events such as hard parses at the top of the load profile section of the AWR report, indicating that this is what is slowing down the database.

Step 3: As a DBA you might know that a single poorly written adhoc query has potential to bring an entire database to its knees. See if you can identify one or more poorly written SQL that may be leading to the hung database.

Step 4: See if large expdp/impdp operation running in parallel mode consuming all database resources.

Step 5: Check the database for blocking locks and latch contention.

Step 6: Check the server memory usage and CPU usage. Make sure that the sessions are not stalling because of low sized PGA. (not required if u configured AMM)

Step 7:See if it is caused by filling up of all archive log destination. If Archive destination is full, database will hand. Here in this case you can connect as sys and make room for archive log. You can also changed the archive log destination temporarily and then clean up the original destination and then change the archive log destination pointing to original one.

Step 8: Check the FRA. A database hangs when it is unable to write flashback database logs to the recovery area. You can fix this problem by increasing the size of the FRA using the command,
SQL>alter system set db_recovery_file_dest_size=10GB; 


Friday, December 14, 2018

Shrinking FND_LOG_MESSAGES

EBS Table Inventory

For a variety of reasons, I took inventory of the largest objects (in this particular case, tables) in my R12.2 EBS environment.  I strongly suggest you do the same, upon occasion, as it’s somewhat enlightening.
select
  owner
 ,segment_name
 ,bytes/1024/1024/1024 gb
from
  dba_segments
where
  segment_type = 'TABLE'
order by
  bytes/1024/1024/1024 desc
At the very top of my list was APPLSYS.FND_LOG_MESSAGES, checking in at 29.4GB.  I now had a target.

Read the directions

This is EBS, we can’t just arbitrarily start shooting and hope we don’t break anything.  There’s a number of MOS notes on support describing various aspects of purging this table.  Number one on the list was the concurrent request, “Purge Logs and Closed System Alerts”.  There were also some notes about a bug which prevented this CR from performing correctly, but they didn’t seem relevant to EBS 12.2
Back to my problem child
SQL> select count(*) from applsys.fnd_log_messages;

  COUNT(*)
----------
       308
This jumps out immediately.
SQL> select owner, segment_name, bytes/1024/1024/1024 gb 
from dba_segments where segment_type = 'TABLE' 
and segment_name = 'FND_LOG_MESSAGES';

OWNER                     SEGMENT_NAME              GB
------------------------- ------------------------- ----------
APPLSYS                   FND_LOG_MESSAGES          29.4005127

I run Concurrent Request “Purge Logs and Closed System Alerts” every week, and the log shows it’s completing normal.  Why are 308 rows consuming so much space on disk?  Let’s assume that this table has had no attention since it was first installed about 14 years ago.  There were times when debug was on, to be sure, filling FND_LOG_MESSAGES faster than normal.  But after a quick check of Profile Option Values I see that at present, nobody has debug enabled.

Proving out the solution

Is it possible that 14 years of inserts and deletes could cause this table to have developed a bad case of high water mark 29 GB deep?
SQL> alter table applsys.fnd_log_messages enable row movement;

Table altered.

Elapsed: 00:00:00.08
SQL> alter table applsys.fnd_log_messages shrink space;

Table altered.

Elapsed: 00:56:47.99
SQL> select owner, segment_name, 
bytes/1024/1024/1024 gb from dba_segments 
where segment_type = 'TABLE' 
and segment_name = 'FND_LOG_MESSAGES';

OWNER        SEGMENT_NAME     GB
------------ ---------------- ---------
APPLSYS      FND_LOG_MESSAGES 14.501709
Elapsed: 00:00:00.31

Not bad; we’re down from 29.4GB to 14.5GB without much effort.  Let’s go in for the kill
SQL> alter table applsys.fnd_log_messages move;

Table altered.

Elapsed: 00:01:30.32

SQL> select owner, segment_name, 
bytes/1024/1024/1024 gb from dba_segments 
where segment_type = 'TABLE' 
and segment_name = 'FND_LOG_MESSAGES';

OWNER   SEGMENT_NAME     GB
------- ---------------- ----------
APPLSYS FND_LOG_MESSAGES .000366211
Elapsed: 00:00:00.13

Sweet.  29GB down to .0003GB.
Don’t forget that alter table xyz move renders indexes invalid.
set pagesize 0
select
'alter index '
|| owner
|| '.'
|| index_name
|| ' rebuild;'
from
dba_indexes
where
status = 'UNUSABLE'
;
SQL> alter index applsys.fnd_log_messages_n4 rebuild;
Index altered.
SQL> alter index applsys.fnd_log_messages_n5 rebuild;
Index altered.
SQL> alter index applsys.fnd_log_messages_n7 rebuild;
Index altered.
SQL> alter index applsys.fnd_log_messages_n8 rebuild;
Index altered.

R12.2 ADOP quick Notes

ADOP Patching:


adop phases:

prepare       : Prepare the instance for online patching.
apply         : Apply patch(es) to the Patch Edition.  
finalize      : Ready the instance for cutover.  
abort         : Abort the patching cycle.  
cutover       : Promote the Patch Edition to Run Edition.   
cleanup       : Drop obsolete objects and seed data from Old Editions.
actualize_all : Actualize all objects in the Patch Edition.   
cleanup_full  : Cleanup and drop Old Editions.   
abandon       : yes|no - Abandon failed patches.


adop patch log directory:

<INSTALL BASE>/fs_ne/EBSapps/log/adop


adop patch process cycle steps:

Download any required technology patches and unzip the contents. The patch contents may be unzipped into  $NE_BASE/EBSapps/patch.

1. Prepare the system for patching. 

   source <EBS_ROOT>/EBSapps.env run

   $ adop phase=prepare 

2. Apply technology patches to the Oracle Home under the Patch f/s using the information below. 

   source <EBS_ROOT>/EBSapps.env patch 

3. Apply any Oracle E-Business Suite patches planned for this patching cycle 

   $ adop phase=apply patches=<patch_list> 

4. After all patches have been successfully applied, complete the patching cycle. 

   $ adop phase=finalize 
   $ adop phase=cutover 

Note: Below steps can be done when applications are up and running 

5. source <EBS_ROOT>/EBSapps.env run 
   
   $ adop phase=cleanup

6. To complete the process and synchronize the technology level between patch and run f/s. 

   $ adop phase=fs_clone


adop hotpatch steps (we cannot abort hotpatch and abondon cannot be done):

Hotpatch which can apply directly on run fs

$ adop phase=apply patches=<patch_list> hotpatch=yes

After hotpatch please run phase=cleanup and phase=fs_clone to sync the run fs with patch fs to prepare for next patching cycle


adop re-apply patch forcefully:

If we try to re-apply the patch which is already applied/exists then adop patch terminates 
with below message and by default it takes N when prompted. to overcome this we need to
re-apply patch with options=forceapply.


This Patch seems to have been applied already.
Would you like to continue anyway  [N] ? N *


$ adop phase=apply patches=<patch list> hotpatch=yes options=forceapply


adop deal with "Continue As If It Were Successful" error:

$ adop phase=apply patches=<patch list> abandon=no restart=yes flags=autoskip


To define workers in adop:


$ adop phase=apply patches=<patch list> workers=5


To define patchtop in adop:


$ adop phase=apply patches=<patch list> patchtop=<patch location base>


adop merge patch:


$ adop phase=apply patches=<patch list> merge=yes


Restarting adop From A Failed Session:


 $ adop phase=abort
 $ adop phase=cleanup cleanup_mode=full
 $ adop phase=fs_clone 

Then reapply the patch


adop apply for language patch:


$ adop phase=apply patches=18023722_ESA:u18023722.drv


adop non-interactive with patch top and define driver:


$ adop phase=apply options=nocopyportion patchtop=$XLA_TOP/patch/115 patches=driver:xla5584908.drv


adop Steps to follow to skip the failed workers:


1. Use adctrl and select option#8 (This will not be visible) to skip thefailed jobs
2. Restart adop using "restart=yes" parameter

** If the failed jobs are numerous, then better to re-start this patch once again with autoskip option.

ie.  adop restart=no abandon=yes flags=autoskip 

This command will restart the patch once again from starting onwards and will skip all the failures if any comes. But make sure to review the log file at the end of the patch application that you have skipped the failures that you want to.


Weblogic Server Smart Update Patching :


Steps to apply weblogic server smart update patch:


Refer Note: 
How to Apply WebLogic Server (WLS) Patches Using Smart Update [Video] (Doc ID 876004.1)

1.Download the patch 
2.Copy the files (for example, E5W8.jar and WGQJ.jar) and the patch-catalog_xxx.xml from the zip file to the target machine. You do not need the readme file.
Path: $FMW_HOME/utils/bsu/cache_dir

3.cd $FMW_HOME/utils/bsu

To install patch:
./bsu.sh -prod_dir=$FMW_HOME/wlserver_10.3 -patchlist=7FC9 -verbose -install

To Verify:
./bsu.sh -prod_dir=$FMW_HOME/wlserver_10.3 -status=applied -verbose -view | grep 7FC9

To Rollback:
./bsu.sh -remove -patchlist=7FC9 -prod_dir=$FMW_HOME/wlserver_10.3 -verbose

We can also apply the Smart Update patch in graphical (GUI) mode.


Steps to apply opatch on FMW Web Tier HOME :


Set the Environment as below (replace <INSTALL_BASE> path as required): 
 
$ export ORACLE_HOME=$FMW_HOME/webtier
$ export PATH=$ORACLE_HOME/OPatch:$PATH

$ opatch lsinventory 


Apply opatch:

$ opatch apply


Steps to apply opatch on FMW oracle_common HOME :


Set the Environment as below:

$ export ORACLE_HOME=$FMW_HOME/oracle_common
$ export PATH=$ORACLE_HOME/OPatch:$PATH

$ opatch lsinventory 

Apply opatch:

$ opatch apply


Queries :

Query to check if a patch is applied in Oracle EBS R12.2.x:

In Oracle E Business Suite (ebs erp) R12.2.x you cannot query the AD_BUGS table to check if patches have been applied..
The AD_BUGS table may have entries for patches that were applied but later the patching cycle was aborted (not really applied).


The way to check whether a patch is really applied is to use the AD_PATCH.IS_PATCH_APPLIED PL/SQL function.

Usage:

select AD_PATCH.IS_PATCH_APPLIED(\'$release\',\'$appltop_id\',\'$patch_no\',\'$language\') 
from dual;

Example sql:

SELECT adb.bug_number,ad_patch.is_patch_applied('11i', 1045, adb.bug_number)
FROM ad_bugs adb
WHERE adb.bug_number in (20034256);

or for single app tier installations:

select ad_patch.is_patch_applied('R12',-1,20034256) from dual;

Expected results:

EXPLICIT = applied
NOT APPLIED = not applied / aborted

Note: If you are sure patch is applied, but showing as not applied then do the following workaround.

1. Start adadmin after source the RUN FS env.
2. Select "2. Maintain Applications Files menu" in "AD Administration Main Menu".
3. In "Maintain Applications Files", select "4. Maintain snapshot information".
4. Select "2. Update current view snapshot" in the "Maintain Snapshot Information".
5. Select "1. Update Complete APPL_TOP" in the "Maintain Current View Snapshot Information".


Query to check current AD patchset:

SELECT a.application_short_name, b.patch_level
FROM fnd_application_vl a,fnd_product_installations b
WHERE a.application_id = b.application_id
  and application_short_name = 'AD';


Query to check patches applied correctly and in the expected sequence:


1.1.Run this sql statement:

   select * from ad_adop_session_patches order by end_date desc;

1.2. Run this piece of sql code:

   set pagesize 200;
   set linesize 160;
   column adop_session_id format 999999999999;
   column bug_number format a15;
   column status format a15;
   column applied_file_system_base format a23;
   column patch_file_system_base format a23;
   column adpatch_options format a15;
   column node_name format a15;
   column end_date format a15;
   column clone_status format a15;

   select ADOP_SESSION_ID, BUG_NUMBER, STATUS, APPLIED_FILE_SYSTEM_BASE, PATCH_FILE_SYS   TEM_BASE, ADPATCH_OPTIONS, NODE_NAME, END_DATE, CLONE_STATUS
   from ad_adop_session_patches
   order by end_date desc;
 

Below are possible values of STATUS column:
N - Not Applied In the current node but applied in other nodes
R - Patch Application is going on.
H - Patch failed in the middle. (Hard Failure)
F - Patch failed in the middle but user tried to skip some failures.
S - Patch Application succeeded after skipping the failed jobs.
Y - Patch Application succeeded.
C - Reserved for clone and config_clone. Indicates clone completed


Query to Check AD and TXK C Patch levels:


SELECT codelevel FROM AD_TRACKABLE_ENTITIES WHERE abbreviation in ('txk','ad');

Database Options/Management Packs Usage Reporting for Oracle Databases 11.2 and later (Doc ID 1317265.1)

  Database Options/Management Packs Usage Report You can determine whether an option is currently in use in a database by running options_pa...